Close Menu
Geekz TopiaGeekz Topia
  • Home
  • Android
    • Custom Rom
    • Apps
  • Windows
  • Linux
  • Home
  • Android
    • Custom Rom
    • Apps
  • Windows
  • Linux
Facebook X (Twitter) Instagram
Geekz TopiaGeekz Topia
  • Home
  • Android
    • Custom Rom
    • Apps
  • Windows
  • Linux
Geekz TopiaGeekz Topia
You are atHome»Android»HOW TO ROOT REDMI NOTE 11 PRO 5G USING MAGISK WITHOUT TWRP
Android

HOW TO ROOT REDMI NOTE 11 PRO 5G USING MAGISK WITHOUT TWRP

Avinash ChandranBy Avinash ChandranSeptember 8, 2023Updated:September 25, 2023No Comments3 Mins Read
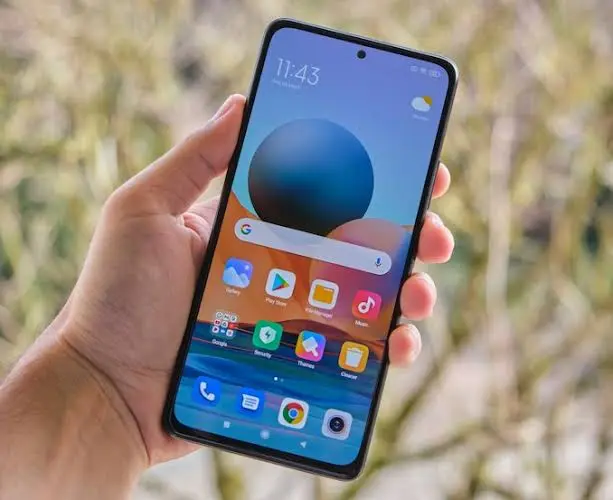
redmi nte 11

Are you searching for how to root Redmi Note 11 Pro 5G with Magisk Manager? Then you are at the right place. Here you can get all the details about the Rooting and installation of Magisk on your Redmi Note 11 Pro 5G model.

Redmi Note 11 Pro 5G is the latest release from Xiaomi Redmi. It comes with the latest 5 G technology.

This device has 6.6 inches of super AMOLED HD display with a 120Hz refresh rate. So the screen will be crispy and clear and give a smooth display experience.

Moving on to the storage part it comes with mainly 3 storage varients 6GB RAM/128GB, 8GB RAM / 128GB, and 8GB RAM / 256 GB.

Table of Contents

  • What is Rooting
    • Advantages of Rooting
    • Disadvantages
  • How to Root Redmi note 11 pro 5G
    • Things to keep in mind
    • Download Files
    • Steps To Follow

What is Rooting

Rooting is the process of getting Super permissions. With Rooting you can do a lot of things like de-bloating and installing custom ROMs.

But before rooting your Redmi Note 11 Pro you should know what are the advantages and disadvantages of Rooting. So let’s check them.

Advantages of Rooting

  1. You install Custom Recovery
  2. Install Custom ROM
  3. Install unwanted System apps
  4. Install system-wide adblocker
  5. Install Magisk manager
  6. Increase device performance by installing l speed magisk module
  7. Extra RAM and storage management permissions by Mangnater magisk module
  8. Extra Customisation permissions
  9. Can take a complete backup of your device
  10. Install unsupported applications
  11. Unlock the Device using Android multi tools

Disadvantages

  1. You will lose your warranty
  2. High chance of device damage
  3. Bootloop
  4. Hard brick or soft brick
  5. Chances to get your device hacked

How to Root Redmi note 11 pro 5G

Follow the below-mentioned steps carefully to root your Redmi Device.

Things to keep in mind

  • You will not get a warranty
  • You will not get OTS updates after Rooting
  • Backup your data
  • Make sure your device has more than 60%+ battery backup
  • The bootloader should be unlocked before beginning
  • Keep your PC nearby

Download Files

  • Firmware – Download
  • Magisk manager latest
  • ADB and fastboot drivers – Download

Steps To Follow

  1. Download all required files
  2. Now extract the firmware on your pc
  3. Connect your device to the pc Using a data cable and copy-paste the boot image from pc to the device.
  4. Install Magiskanager apk
  5. Open APK and click on Install Magisk and continue with the installation
  6. Now click on install once more and re-install
  7. Tap on the patch to boot the image
  8. Now open the file manager and go to internal storage and select boot image
  9. After patching copy it and paste it to the same extracted folder on pc

Now you have to install the patched boot image to your Redmi note 11 Pro 5G

  1. Unzip the ADB folder and keep the boot image in same Extracted ADB folder together
  2. Hold the shift key on your keyboard+ right click mouse and select power shell. In the same folder
  3. Paste the following command and press enter to install the patched boot image
fastboot flash boot patched_boot.img

Now Reboot your android device.

That’s it you have successfully root Redmi note 11 Pro 5G without Custom recovery.

To check root access you can install Root checker apps.

Share. Facebook Twitter Pinterest LinkedIn Tumblr Email
Avinash Chandran
  • Website
  • Facebook
  • X (Twitter)
  • Instagram
  • LinkedIn

Avinash Chandran is a passionate writer with a dedicated focus on technology. Possessing a keen interest in subjects ranging from Android, Windows, games, gadgets, career and education. Avinash brings forth both expertise and enthusiasm to craft captivating content. Learn More

Related Posts

How To Send Apps Between Android Devices

November 24, 2023

How to Uninstall Multiple Apps at Once on Android

October 30, 2023

Best Android Launchers To Use In 2023

September 11, 2023
Add A Comment

Leave A Reply Cancel Reply

Recent Posts
  • How To Send Apps Between Android Devices
  • Solved – Internet not working after windows 11 23H2 update
  • Fix: Update KB5032189 Not Installing on Windows 10
  • How to Enable or Disable Windows Recovery Environment (WinRe) on Windows 10 and 11
  • How to Record Clubhouse Audio on iPhone and Android – Guide
Latest Post

How To Send Apps Between Android Devices

November 24, 2023

Solved – Internet not working after windows 11 23H2 update

November 18, 2023

Fix: Update KB5032189 Not Installing on Windows 10

November 17, 2023

How to Enable or Disable Windows Recovery Environment (WinRe) on Windows 10 and 11

November 16, 2023
Android

How To Send Apps Between Android Devices

How to Uninstall Multiple Apps at Once on Android

Best Android Launchers To Use In 2023

Best 5 Lightweight Android Browser Apps To Use In 2023

Windows

Solved – Internet not working after windows 11 23H2 update

Fix: Update KB5032189 Not Installing on Windows 10

How to Enable or Disable Windows Recovery Environment (WinRe) on Windows 10 and 11

How to Log Off Other Users on Windows 11

Linux

How to Install Jellyfin Media Server on Linux?

BEST LINUX DISTRIBUTIONS – 2023

Tech Guides

How To Send Apps Between Android Devices

How to Record Clubhouse Audio on iPhone and Android – Guide

How To Download Photos From Signal – Guide

How to Optimize Smartphone Settings for Better Battery Life

© 2023 . Maintained by Team GeekzTopia
  • Privacy Policy
  • Desclaimer
  • About us
  • Our Authors
    • Avinash Chandran P
  • Contact us

Type above and press Enter to search. Press Esc to cancel.