Recently after Windows 11 23H2 Update some users reported that they are not able to connect to their Wifi. For some users, it’s getting connected to wifi but No Internet Access. This happened right after they updated to the latest Windows 11 23H2 update.
There might be multiple reasons why the internet is not accessible after connecting to WiFi or randomly disconnecting from WiFi.
The issue might be happening because of ISP, incorrect network configuration, or some other settings or security software blocking your device from connecting to WiFi.
So here I tried to find out why this problem happened and show you how to solve this issue. There might be multiple reasons or the reason may be different for different users. But the suggested solutions will work.
Check how to fix Update KB5032189 Not Installing on Windows 10
Why Internet not working on Your Windows 11
As i said above there might be different reasons or multiple reasons why your pc is not connecting to the internet or Wifi.
- There might be issues with your network driver
- Maybe Hotspot or Modem is on but Internet Access is not enabled
- ISP issues
- Configuration issue
- Software Conflicts
Running related troubleshooters can fix almost all of the problems.
Let’s check some methods and steps to solve these Issues
1. Check Internet Connection
Check your router, and make sure it is configured and connected to the internet. You check this through the router Admin panel. Access the Admin panel using your smartphone and check. If it is all ok try restarting your Computer as well as router.
- Press and Hold the Router Power button
- It will turn off and start Rebooting
2. Forget WiFi Connection
The Next way is to forget the WiFi connection. you can do this especially when your device is connected to WiFi but no Internet.
If your WiFi is previously connected and saved it is better to try to forget the WiFi connection and reconnect.
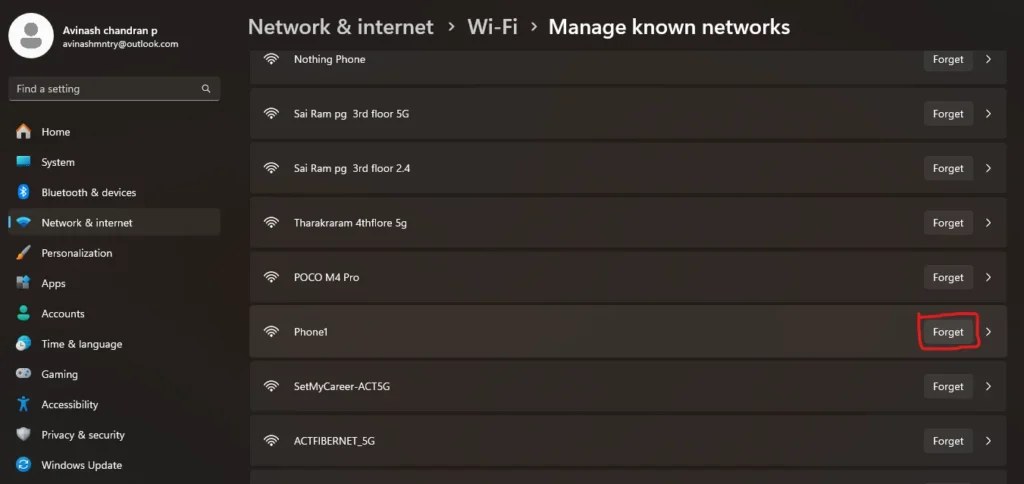
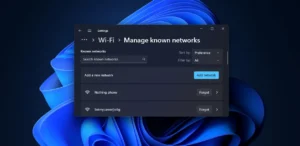
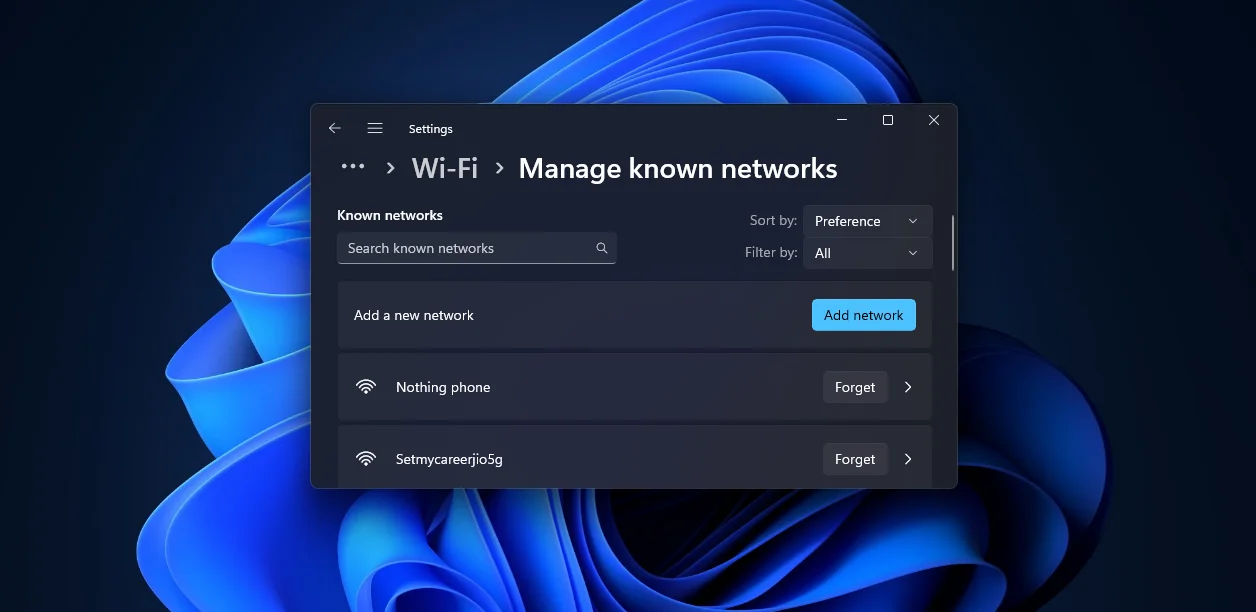
- Go to Settings -> Network Internet Wifi
- Click on Manage Known Network
- Select saved WiFi Network and click on Forget
- You can also do this from Taskbar
3. Run Network Troubleshooter
Running the network troubleshooter really saves you from problems like WiFi not connecting or internet-related issues. The Troubleshooter software Check what is causing the issue and try to fix it.
Let’s check how to do this
- Press the Windows key and select settings from the menu
- Go to system, Troubleshooter and other Troubleshooter
- Now you can see a list of troubleshooters
- Select network Adaptor and click on the Run button next after it
- Now select which network adaptor you want to diagnose. In our case, we have to check the Internet and Wi-Fi connection, so select WiFi adaptor click on next, and follow the onscreen instructions
Once you click next the troubleshooters will start to diagnose your WiFi adaptor to find the error.
4. Switch Your DNS
Sometimes switching DNS connection can Help you from internet and network-related issues. Let’s see how to switch your DNS to Google DNS.
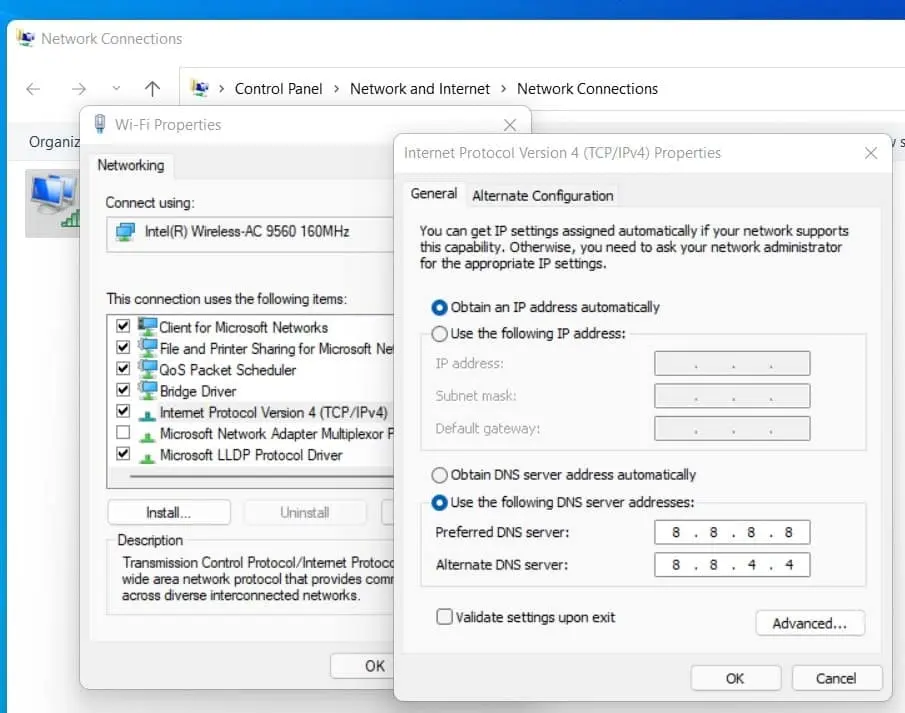
- Press the Windows + R keys together type ncpa.cpl and click ok Open network connection Window.
- Once the Network connection window is open locate your active WiFi network adaptor and select the properties
- Open the properties window of TCP/Ip4 version
- Now set the Default DNS server as 8.8.8.8 and the alternative DNS server as 8.8.4.4 and click OK to save
Now try connecting to the internet.
5. Reinstall WiFi Adaptor
If any of the above methods did not work for you then you try resetting or reinstalling the WiFi adaptor through the Windows device manager. It’s quite easy to reset and reinstall the WiFi adaptor through Windows device manager and it can solve almost all problems with your wifi adaptor.
- Open the Start Menu and search for the device manager
- Click on the device manager
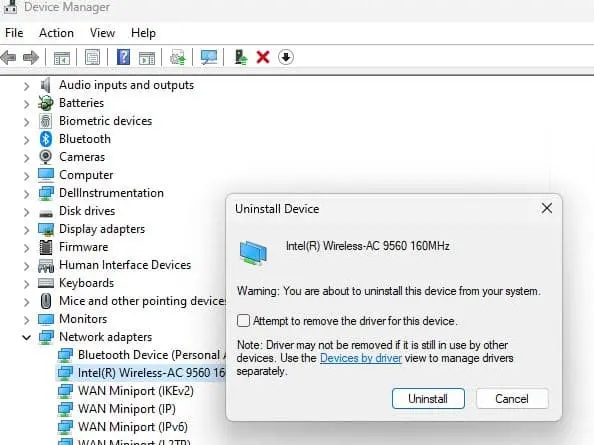
- Once the device manager window is open select your active WiFi adaptor
- Right Click and click on Uninstall Device
- Now restart your system and open the Device Manager window once more
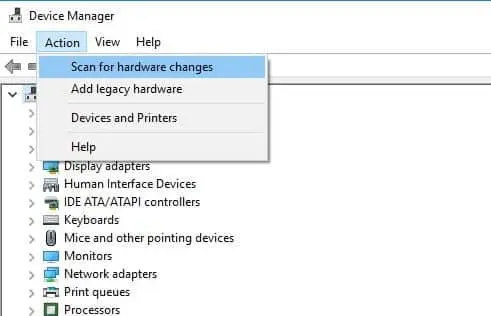
- Click on the action and select Scan for hardware changes
- The uninstalled device will automatically get detected and installed
- Once it’s done try connecting to your WiFi network and accessing internet
Conclusion
WiFi and network-related issues can happen at any time but you should know how To fix these issues. It may be coming just because of wrong configuration in network settings or adaptor driver-related issues.
Always remember to enable Windows Recovery Environment for resetting your PC if anything goes wrong.
Did the above fixes and tips solve your WiFi and network-related issues? Let us know in the comments I’m always happy to Help.

